In Into the Wild with AKS Automatic: The Cluster Awakens we deployed the cluster. Now it’s time to explore what was brought online. In this post, we’ll cover the following topics:
Cluster Nodes
In this section, we explore the cluster nodes that are provisioned as part of a default deployment — the core infrastructure quietly keeping the galaxy in balance.
System Node Pool
In Into the Wild with AKS Automatic: The Cluster Awakens, we deployed an AKS Automatic cluster using a simple configuration. To see the nodes that were brought online as part of this deployment, run the following command:
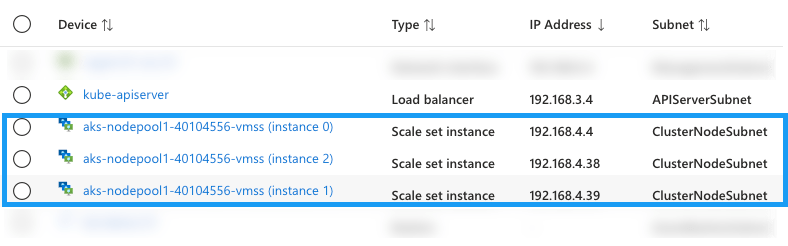
kubectl get nodes -o wideYou should notice that three nodes have been deployed.

When examining the node names and IP addresses, you’ll notice that they correspond to network interfaces created in the ClusterNodeSubnet.
These nodes are used to support the cluster system node pool. To view the pods running on these nodes, run the following command:
kubectl get pods --all-namespaces -o wide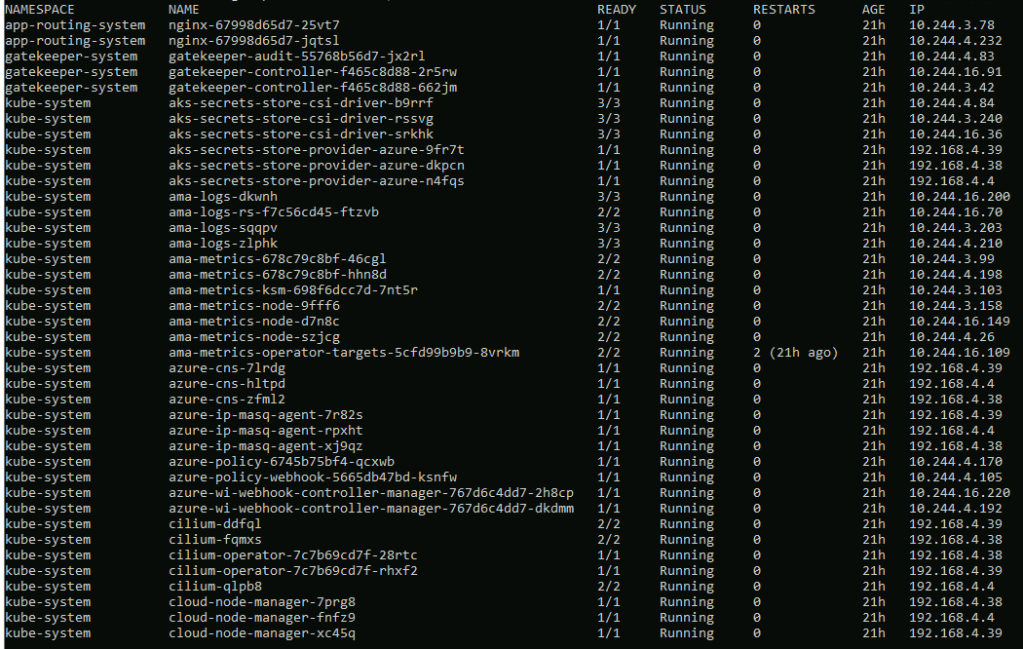
Workloads that you deploy will not be scheduled to these nodes.
User Node Pool
To view the node pools available for scheduling your pods, run the following command:
kubectl get nodepools -o wide
In an out-of-the-box deployment, AKS Automatic provisions two node pools:
- system-surge: The system-surge node pool provides ephemeral “buffer” nodes that AKS uses during upgrades, repairs, and configuration changes. This temporary capacity allows maintenance operations to occur without disrupting running workloads.
- default: The default node pool is created as part of the initial deployment. You’ll notice that the node count for this pool is initially zero. When a workload is deployed to the cluster, nodes are automatically provisioned in this pool to support the workload.
To illustrate how nodes are provisioned in the default node pool, run the following commands:
kubectl create ns aks-store-demokubectl apply -n aks-store-demo -f https://raw.githubusercontent.com/Azure-Samples/aks-store-demo/main/aks-store-ingress-quickstart.yamlkubectl get pods -n aks-store-demoRun the following command to monitor the provisioning status of the pods. It may take approximately five minutes for the pods to be deployed, as the node for the node pool must first be provisioned.
kubectl get pods -n aks-store-demo -w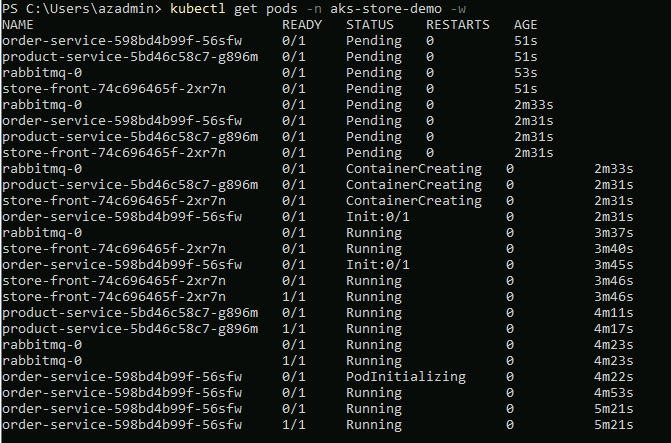
Run the following command view the new state of the default node pool.
kubectl get nodepools -o wide
To view the nodes in the cluster, run the following command. You’ll notice a node has been provisioned for the default node pool.
kubectl get nodes -o wide


Leave a comment